Tidal and Apple Music are both popular music streaming platforms. Tidal is famous for its high-fidelity music. With a HiFi Plus subscription that costs 19.99 per month, you can get MQA music up to 24-bit, 192 kHz. If you reckon it’s costly and can accept less high sound quality, you can try Apple Music, which has a large music library and a solid integration with the Apple ecosystem. To avoid losing your carefully created Tidal playlists, you may wonder about manually adding each song again. Frankly, you don’t have to. There are 5 functional ways that can help you transfer Tidal playlist to Apple Music automatically. Scroll down and get more information you desire.

Part 1. Export Tidal Playlist to Apple Music on Computer
Here are some great solutions to help you convert your Tidal playlist to Apple Music on a computer desktop. You just need to choose one and follow the tutorial to finish the whole operation stepwise.
1.1 AudBite Tidal Music Converter
There is no doubt that the best way to transfer your Tidal playlist to Apple Music is by converting your playlist to a transferable file. Then you can not only transfer it to other music platforms, software, and even devices, but also upload it to cloud service for backing up. The storage of this music file on your computer is everlasting.
However, Tidal does not support you in doing so. Its music is DRM-protected and can’t be played out of the Tidal app. That’s the reason why you need the AudBite Tidal Music Converter, a professional and functional Tidal downloader and converter.
Every user can access the program easily. It is available on both Mac and Windows and useful for all Tidal Free/HiFi/HiFi Plus users. With its assistance, you are capable of downloading your playlists from Tidal directly. During the downloading and conversion progress, it smartly keeps the original sound quality and the ID3 information like title, album, and year. This can help maintain your listening experience and let you organize the playlist on Apple Music effortlessly. To be compatible with other devices, it also supports converting music to MP3, AAC, WAV, FLAC, M4A, and M4B.
Main Features of AudBite Tidal Music Converter:
- Download types of music files from Tidal to a local computer
- Support Tidal tracks, podcasts, albums, playlists, and more
- Preserve 100% original sound quality and ID3 tags
- Convert Tidal to MP3, AAC, WAV, FLAC, M4A, and M4B
- Download music at 5X faster speed for offline listening anywhere
Step 1 Choose Tidal playlists for adding
Before you start the conversion, please make sure that you already prepared AudBite Tidal Music Converter and logged in to your account on the pre-installed Tidal app.
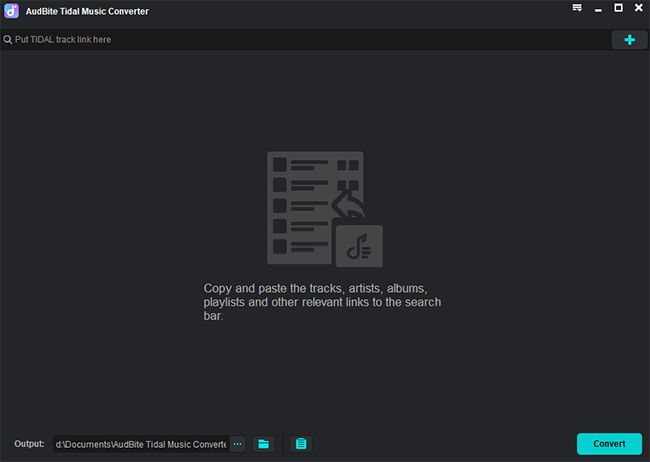
Open the AudBite converter, and the Tidal app will automatically open. Find the playlist you want to convert, then copy its link and go back to the program. Paste it to the search bar in the top interface and hit the enter button on your keyboard.
Step 2 Reset preferences settings
Click the Preferences button on the menu section at the top of the window. Then choose Convert to reset the parameters, like output format, channel, sample rate, etc. according to your preference.

Note: To ensure the import process to Apple Music is smooth, the audio files should be AAC, AIFF, Apple Lossless, MP3, or WAV. You can choose the compatible formats like MP3, AAC, or WAV in the program.
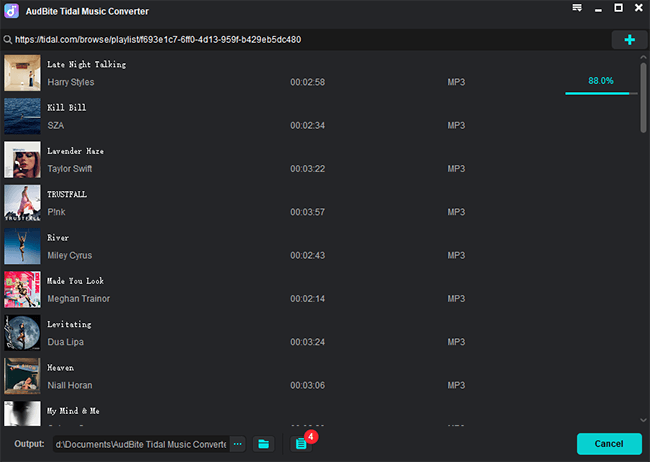
Step 3 Convert Tidal playlist for Apple Music
Hit the Convert button in the program and the conversion begins. It may take a while. How much time it takes depends on the number of tracks you convert. Once done, the clickable Converted icon will show you the storage path of the downloads.
Step 4 Transfer local Tidal playlist to Apple Music
Now you can transfer your Tidal playlist from the local folder that contains it. Below, we outline the exact steps and you can follow them.
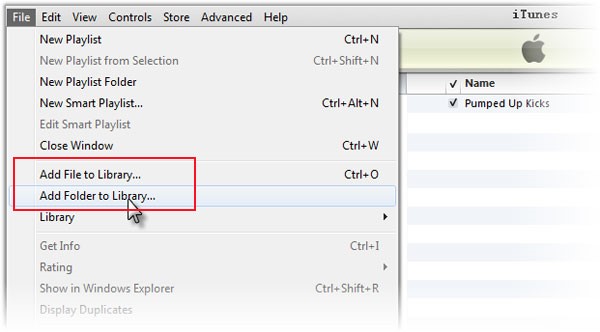
1) Open your iTunes app (Apple Music on macOS 10.15 and later) on your computer.
2) At the top menu section, click File – Add Folder to Library. Then navigate to the location of your downloaded Tidal playlists and add them to iTunes. Or you can directly drag and drop whichever you like to iTunes.
3) Click Songs in the left bar to check whether you successfully import all tracks from your playlist on the iTunes library.
1.2 FreeYourMusic
FreeYourMusic is a professional transfer tool. It helps you transfer playlists across diverse music platforms, including Spotify, Tidal, Apple Music, Amazon Music, etc. Below you can see the detailed steps on how to use it to transfer your Tidal playlist to Apple Music.
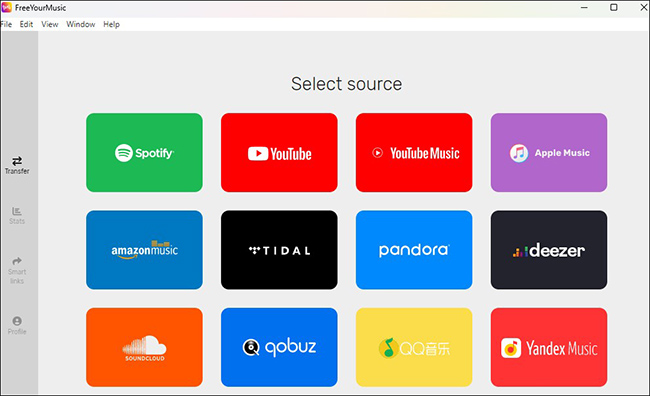
1) Install and launch the tool on your computer. Choose Tidal as the source in the Select source window.
2) Log in to your Tidal account on the pop-up web page.
3) Go back to the tool and choose Apple Music as the destination. Log in to your account.
4) Choose the playlist you want to convert and click Begin transfer. Once the transfer is finished, you can enjoy your Tidal playlist on Apple Music for streaming.
1.3 MusConv
Talking about the transfer tool, MusConv is also a good one. As a powerful migration program, it enables you to transfer your playlist, albums, followed artists, and liked songs to more than 50 music services.
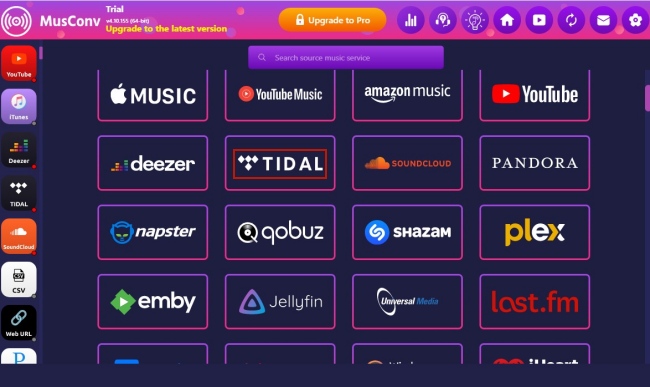
1) Install and launch it on your desktop. Select the source as Tidal. Click it and log in to your account on the web page it pops.
2) Choose the playlist you want. Then select Apple Music as the destination music platform and use your Apple ID to sign in.
3) Wait for a minute and it will move songs for you.
Part 2. How to Convert Tidal Playlist to Apple Music in Browser
If you don’t want to install apps, there are some web-based tools that can do you a favor, simplifying your transfer process from Tidal to Apple Music.
2.1 TuneMyMusic
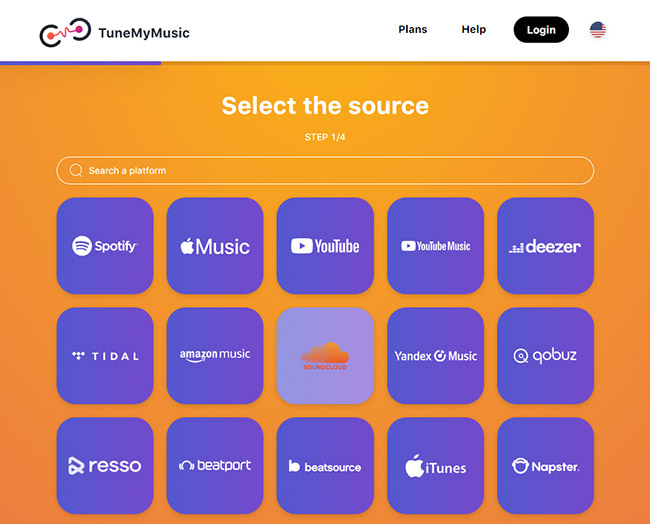
1) Visit the official website of TuneMyMusic and click Let’s start.
2) Select Tidal as the source and click it.
3) Decide the playlist you want to transfer and then click Choose Destination.
4) Choose Apple Music as the destination and click Start Moving My Music to start the process.
2.2 Soundiiz
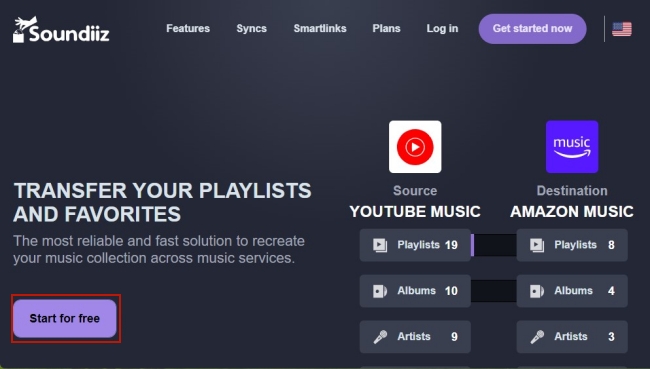
1) Go to the Soundiiz website and click Start for free. Then you should register an account. If you have one, just log in. After that, click Let’s go.
2) Hit the Transfer button on the left sidebar.
3) Select Tidal as the source and Apple Music as the destination. After your accounts are linked, click Start – Playlists.
4) Then choose the playlist you want to transfer and click Confirm my selection – Save configuration.
5) Click Begin the transfer to import your Tidal playlist to Apple Music.
Part 3. Conclusion
This post introduces 5 effective solutions to transfer Tidal playlist to Apple Music. The operations are not difficult as long as you follow the exact steps listed above. For downloading Tidal playlists as local files, you can try AudBite Tidal Music Converter. It will help you fully control and use the downloads as per your inclinations. Also, FreeYourMusic and MusConv are worth trying, which only need simple procedures. If you don’t want to install apps, you can use TuneMyMusic and Soundiiz on the browser to have an online transfer.