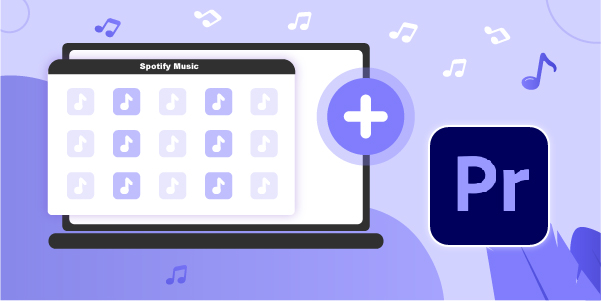
There are several powerful video editing software now, like Shotcut, KineMaster, and so on. Premiere Pro is one of the most popular video editing software developed by Adobe to create videos for films, TV, social media, and the web. Adding background music to your videos enhances the quality of the output. Being one of the most extensive music libraries, Spotify is the perfect choice for your music selections. Therefore, if you are searching for how to add Spotify music to Premiere Pro, this is the right article.
The downside of most streaming services, including Spotify, is that the songs are encoded, so the music can only be played on their applications. Hence, to add Spotify music to videos on Premiere Pro, you need a third-party application to download and convert Spotify music to universal audio formats. Continue reading this article to learn the best tool to convert Spotify music and how to use it to import Spotify songs to Adobe Premiere Pro.
- Part 1. Best Tool to Add Spotify Music to Premiere Pro
- Part 2. How to Import Spotify Songs to Adobe Premiere Pro
Part 1. Best Tool to Add Spotify Music to Premiere Pro
Premiere Pro only supports music from a local folder on your device. As mentioned above, Spotify music files are encrypted files. You have to convert the Spotify music to MP3 or other common formats. This is a significant obstacle many users face when they want to add Spotify music to video. Therefore, we recommend AudBite Spotify Music Converter.
It is the best tool that enables you to remove DRM protection from Spotify music. With this, you can download the songs in popular formats like MP3 without losing quality and play the music on any device of your choice. Thus, you can import Spotify songs to Adobe Premiere Pro.
Main Features of AudBite Spotify Music Converter
- Download ad-free songs from Spotify without premium easily
- Convert Spotify music to MP3, AAC, WAV, FLAC, M4A, M4B
- Save Spotify music up to 320kpbs and with ID3 tags retained
- Support downloading Spotify music in batch at 5× faster speed
Tutorial: How to Convert Spotify Music to Premiere Pro Compatible Format
You will be able to convert the Spotify music to MP3 format compatible with Premiere Pro through the guide below. Let’s see how. First of all, download and install AudBite Spotify Music Converter on your computer.
Step 1: Upload Tracks or Playlists from Spotify to AudBite
Launch AudBite Spotify Music Converter on your computer. It will open the Spotify box, and you should log in to Spotify. Browse through the library to select the songs you want to download. Drag and drop the songs from Spotify to the main interface. Alternatively, copy the URL of the song and paste it on AudBite’s search bar, then click + to upload the music.
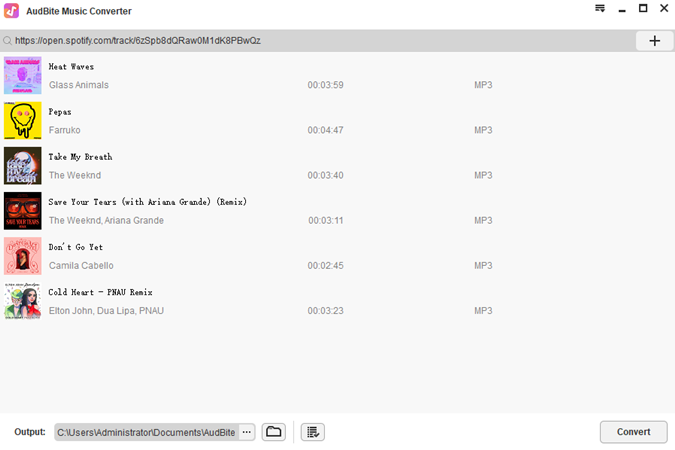
Step 2: Choose the Output Format
After uploading your songs, go to the Menu bar and select Preferences, then tap the Convert tab to choose the output format. The formats are available in MP3, FLAC, WAV, AAC, M4B, and M4A. You can choose MP3 as the output format to be compatible with Premiere Pro. You can also change some parameters like the bit rate, sample rate, and channel and select the destination folder for your music. Click the OK button to save the settings.

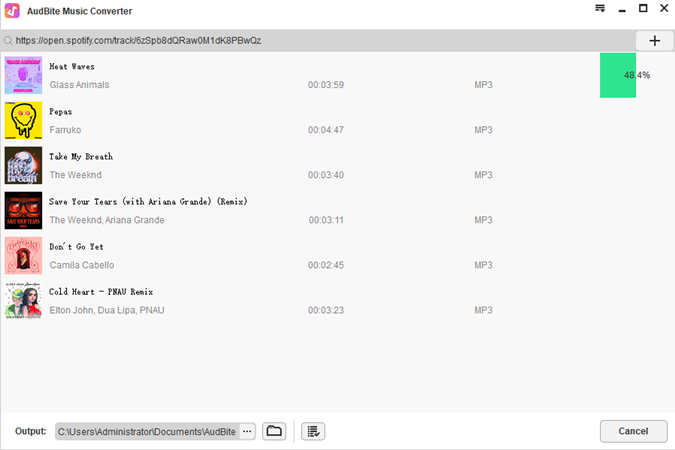
Step 3: Download and Save Spotify Music to Your Computer
After customizing your audio parameters and saving the changes, click the Convert button at the bottom right corner to begin downloading. The software will start getting rid of the DRM and converting the songs to your desired formats. Once the download and conversion process are complete, you will be able to access the downloaded Spotify songs in the destination folder you chose. Select the Converted icon to browse through downloaded songs.
Part 2. How to Import Spotify Songs to Adobe Premiere Pro
You have now converted the necessary Spotify music to a format compatible with Premiere Pro and can be utilized for other purposes. Follow these easy steps below to add music to Premiere Pro videos.
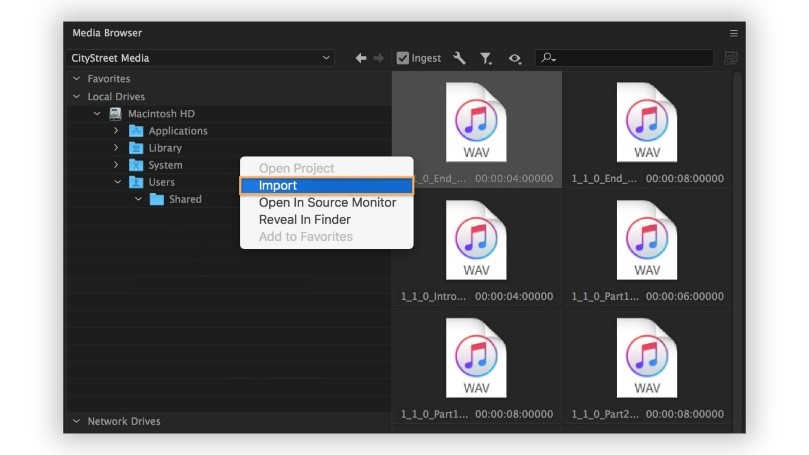
Step 1: Find Your Audio
Select audio at the top of the screen, or navigate the audio by clicking Windows > Workspaces > Audio. Click Media Browser under Windows to display the Media Browser panel. Navigate to the folder with your audio files, right-click, and select import. Ensure the ingest box is checked if you want to add the audio file to your project folder.
Step 2: Add the Audio to Your Sequence
Choose Project under Window to show the Project panel. The imported audio files will be selected — double-click on it to open the source panel and show the waveform. If you want to listen to the audio, you can play it. Drag the audio to the Timeline panel and trip the clip as desired.

Step 3: Adjust the Volume
Use the spacebar to play and pause the audio in the sequence. You can change the volume of the audio track if you feel it is too loud or soft. Choose Audio Track Mixer under Window, and select the sequence name. Move the sliders in the playback controls up or down to adjust the track’s volume in your sequence. You now have the perfect background music for your videos.
Conclusion
There you have it! Now you can remove DRM protection from Spotify music using AudBite Spotify Music Converter and enjoy listening to them freely. You can also easily add Spotify music to Premiere Pro videos by simple steps in this post. If you are interested in AudBite, go to the official website and have a try.